Monday, June 28, 2010

It's official: We are an episode of Holmes on Homes (only without Holmes)

If you read our last post, you'll remember the our master bedroom/hallway wall repairs is on hold due to our "wait and see" experiment in the tub, which seems to be holding up well with no leaks in sight! Given our lack of progress in the master, Ben and I moved inside of the bathroom and decided to start stripping the wallpaper. Why might you ask? Here are a few reasons:
  1. The wallpaper was going to be damaged anyway when we installed cement board around the tub.
  2. Wallpaper in a bathroom is a bad idea (moisture causes the seams to rise).
  3. Though the wallpaper wasn't horrible (we did live with it for 10 months), we didn't like it. 
  4. The wallpaper was hiding bumps and crevices (thus we felt compelled to investigate).
  5. When Ben changed out fixtures last year, it was damaged due to the different placement of items.
Armed with over a gallon of "piranha" wallpaper removal goo, we set to work. The steam method, which Ben perfected in the hallway, wasn't going to work in the bath due to the drywall, so we knew we had to turn to the wet sticky stuff. As we worked our way around the bath, we removed the trim boards, the sink, and all fixtures on the wall. Once the trim came off, we noticed that our vinyl tile was not stuck to the concrete slab as we thought, but was adhered to luan plywood instead. Immediately, my paranoia internal button went off and I panicked. What did I do? Internet research, of course! Not only is luan the cheapest plywood you can buy, I also learned that it should never be used in a bath. Awesome. Without too much convincing, Ben agreed to move a large section of flooring in front of the tub as I was certain the luan plywood underneath the vinyl tile was probably rotten and starting to mold. Although Ben wanted to chisel out the floor, I convinced Ben to use his Festool TS-75 (also known as a plunge-cut saw) under the condition that I would clean any adhesive that stuck to the blade.

Side note: Before Ben cut the floor, as we moved around the bathroom removing wallpaper, we discovered that beneath the luan plywood was vinyl sheet flooring in a lovely faux wood pattern (as if there isn't enough in the kitchen already), which was stuck to a cream vinyl sheet flooring. Just to recap the flooring from the ground up:
  • Base layer: Concrete slab
  • Layer 1: Cream vinyl sheet flooring
  • Layer 2: Faux wood vinyl sheet flooring
  • Layer 3: Laun plywood
  • Layer 4: Vinyl tile
Ben and I realized we had a decision to make: Fix the luan plywood by the tub or rip out the floor? Neither Ben nor I wanted to rip out the floor, so we opted for the quick fix. We had extra vinyl tile in the garage, so we knew we could repair anything we removed.

Although Ben only intended to cut through the vinyl tile and plywood (see image where Ben is smiling before he sawed through the floor), he accidentally cut through the faux wood layer. When he ripped up the flooring, we discovered mold, which is noticeable in the various dark blobs in the picture to your left. This was not just any mold, mind you, but the sort where you envision mold wars transpiring between the layers. Oh, and the smell was awful, as you can imagine.

As soon as that large piece of flooring came up, we knew the floors had to come out. Since Ben had a project to complete for work, I put on the respirator, took out a hammer, a scraper, put on earplugs, and went to work. Three hours later, I had cleared a space of about 5 feet by 16". Removing layers of vinyl flooring is (expletive, expletive) work. Though the labor was intense and my arm went numb at points, it was satisfying to know that the worst of the mold was gone and no longer near the tub.

The bath, in its current state, is free of wallpaper (except behind the toilet) and 40% of flooring is removed. Much to Ben's delight, he remember he owned the Festool LS 130 with a scraper attachment (an electronic floor scraper for all those who don't know the Festool lingo). Needless to say, when Ben went into do floor removal, he was able to clear a section of flooring in about an hour compared to my three. Thanks Ben for letting me know that you had that tool before I scrapped up the floor by hand. I appreciate that.

So where to go from here? Well, since the bathroom is practically gutted, we decided what the hell, let's do a budget-minded remodel. Ben does work for a cabinet company after all and knows how use 20-20 software for work, so he can make a 3D version of our bath using the exact specs of the product we intend to buy. We'll post his sketch-up of the new bath soon, but in the meantime, check out what we've decided on for the look of the bath remodel.

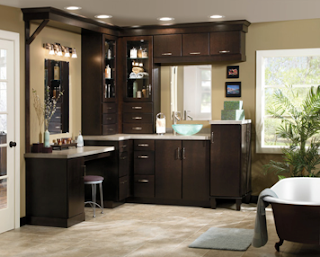
Cabinets: Aristokraft Teagan in Sarsaparilla
Floor tile: It's a gray porcelain tile that mimics concrete (Style: Etch, Color: Nero)


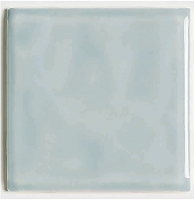
Wall tile - American Olean Earthenware Spa Glass Glazed Ceramic Tile (bought on clearance at Lowe's!). This tile will go around the fiberglass tub surround and will also serve as wainscoting on two walls.
Sink - Koehler Ladena(TM) Undercounter Lavatory in White
Ben found a guy who manufactures limestone countertops in our area, so that's what we'll be using in the bath. If you have any ideas/feedback on what we've picked out thus far, don't be afraid to leave a comment at the end of this post. We love our blog readers -- all three of you :-)

Wednesday, June 16, 2010

Cue the music: "And the walls came tumblin' down. . "

Where to begin. . .

Being the multi-taskers that we are, we thought it might be a good time to finally get the cracks in the master bedroom fixed. Just to jog your memory (or if you're new to our blog), shortly after we moved in, we noticed cracks in the master bedroom reemerging. As they grew bigger, we began to grow more nervous and eventually hired a structural engineer from Indy to come down and assess the situation. In short, he told us our back-corner foundation issue was due to the neighbor's maple and we should get that cut down asap, get the cracks fixed and repaired by professionals, and tuckpoint the parts that need work on the exterior of the home. We got the maple cut down right away, but we couldn't get the bedroom cracks patched because the room was FULL of storage. During the late winter months, we slowly moved items out and once I finished teaching for the summer, I started calling plaster contractors to get bids.

We ended up going with a company called Kelly Plastering. Not to brag about them, but Tom Kelly (and his brother Tim) are PASSIONATE about plaster. These guys LOVE the stuff and are superior craftsmen. I highly recommend Tom and Tim (also known as Slick) to anyone in the Bedford/Bloomington area. Since repairing the plaster was a one man job, Tom started working solo in the bedroom on Thursday June 10. About two hours into the job I hear, "Tiffany, could you come here for a second?" So, I walk over to the bedroom and Tom says, "Your wall is rotted out. Look, it's just coming out in huge chunks."

After a contemplative pause, I quietly said to Tom, "Tom, I'm going to call my husband. I think it's best if you give this news to Ben." Tom graciously explained the situation to Ben and then we got to work. I sprang into action becoming Tom's sidekick. As he ripped down the walls, I started to move the debris into black bags. I will add that before the cracks emerged in our walls, we had new carpet put into the bedroom, so as you look at the demo picture to your left, keep in mind brand new carpet is dwelling underneath the rubble and dust.

As noted in the picture of a close-up of the wood, not only was a majority of the frame rotten, (surprise!) it seems that there was termite damage at some point. Had there been live termites (that SWARM mind you when disturbed), I would have screamed, so I'm glad I didn't have to deal with that as well. I should add that though the little guys were present in the past, the house is primarily composed of cement blocks and limestone. Given there is practically no wood in the framing in the main portion of the house, I hope that the termites that once visited us are happily munching away on some other home.

Tom and I completely demoed the wall and rebuilt the frame. While Tom worked and I grabbed the various tools that he needed, introducing him to Festool products along the way. I think the Kapex (the compound sliding miter saw) sold him on the system. Before Tom left at the end of the day, he let me know that in the morning he was going to bring his brother to finish out the plaster job while he repaired the walls.

That night, when Ben came home, we worked until 1 a.m. cleaning up the master bedroom area. We re-secured the plastic protective sheets to the wall and Ben did more demo work (as there was some mold behind the back of the tub). Exhausted and dirty, we both took long showers. On Friday morning, Ben took a shower and went to work. Shortly after he left, Tom and Slick arrived. Although I was upset that Ben had showered in the morning (seeing as how Tom and I were going to demo out the drywall that had been installed around the tub in lieu of cement board - don't even get me started on that), I'm really glad that Ben showered because Tom discovered that our tub was leaking! Tom and I didn't catch the leak the day before because the leak was so small, but any leak behind a bathroom wall is deadly. The cause of the leak, you ask? Well, it turns out that the tub wasn't level due to an oversized plumbing access hole.
Let's just say, I'm surprised the tub didn't fall into a hole (though it would have made for an interesting blog post). In addition to the lack of support, the tub lacked effective caulk. Though silcone caulk had been used when the tub was assembled (fyi - we have a two piece tub/shower unit), the caulk probably gave way when people were standing in the shower. Rather than buy a new unit, Slick suggested we try to fix the tub, so Tom secured the base for us and caulked the interior seams. Notice the steel support beam below the tub's feet. Once the tub was repaired, we just had to wait 2-4 days for the caulk to cure. No inconvenience there.

Before I end this particular post, I should note that Tom and Slick did an awesome job with the plaster repair in the rest of the room. It's really a fascinating process. You can use steel support mesh to help secure the walls that have severe cracks (see pic) and then plastering is completed in a two part process. First you apply a thick almost concrete looking layer over the wire mesh and once the plaster sets firm to the touch, a thin coat layer is added. The plaster must dry for 21 days before it can be painted. Now, since the back of the bathroom wall still needs to be done, which will probably be later this week or next, I anticipate we'll get the room painted sometime late July. On the bright side, at least we'll have PLENTY of time to pick out paint colors. I've added an image of the finished plaster work just so you can see what the finished wall repair looks like at the moment. Again, they did an amazing job.

TEASER -- Check back again soon as if you think our situation is bad right now, wait until you read the next post. We're just gettin' started. . .

Monday, June 14, 2010

The Great Outdoors - Part I

Ben and I spend the majority of May tackling the yard. We started on an optimistic note before we got our hands dirty. After weeks of Ben hinting at his desire to get an outdoor patio set, I conceded. We hit a combo of Target and Bed, Bath, & Beyond to make our little set, which includes an umbrella stand, a cute red umbrella (with a cover, so it remains red), a glass table, four chairs, and even two lounging chairs, though we haven't used the lounging chairs yet as there is too much to do on the house to sunbathe (and I'm also allergic to the sun -- details, details).

The same weekend that Ben and I purchased the patio stand, Carol and Ray came to visit. Carol graciously helped us plant beautiful lilies, Gerber daisies, ornamental grass, and Lily of the Valley in our backyard. Ray and Carol were visiting so that Ray could serve as an expert witness for Ben's ticket from his accident in January. The charges were eventually dropped (just as an FYI), but Ben still had to pay the court fees, so in the end he saved about $30 from the original cost of the ticket!

The following weekend we started by cutting back the middle spreading bush. Ben discovered that the city provides composting bins and that for a mere $27, you can have the city cart away your yard waste all summer long.
With our new bin in hand, we went at the deadly beast and filled the bin to the top after only cutting back HALF of the bush! The before and after pictures don't do the immensity of the project justice. We'll finish trimming the front bushes sometime this summer, we hope.

Ben and I wanted to add a little color to the front of the house so we bought some Azalea plants (a pink flowering bush that is just beautiful) and Hostas (to go in between the bushes) for our planter that has been empty since last summer. Ben carefully planted the fine beauties in the proper mix of soil as instructed by the master gardener at Lowe's. Well, wouldn't you know it, it POURED on Ben while he was working and the Azaleas started to lose their flowers within two weeks. Ben searched online and discovered Azaleas don't like their roots to be in the sun, so Ben bought some nifty rubber mulch which provided the plants much needed relief and they recovered well from the sun trauma.


Now that the front yard was starting to look better, the weather turned warmer and we realized it was time to do something about our air conditioning. You see, the air worked last summer, but it wasn't all that great and we even had an AC repair guy visit us last August, at which time he informed us that we had a leak in our line and that we ought to get it fixed, so at the beginning of May, we started getting bids. By the time we hired a contractor around mid-May, it was HOT outside (and, consequently, inside). Being the good home owners that we are, we replaced our 40 to 50 year old furnace as well since it was only working at about 65% efficiency. Our contractor (Richard and his two sons) worked on installing the units during the Memorial day weekend at no extra charge. Though this is by far the most expensive thing we've done to the home as of yet, it was worth every dime (plus, we'll get about a third of the cost back on rebates and tax credits). The cold air efficiency is just bliss. Really, you must visit to experience the joy.

On Sunday of Memorial weekend (since it was too hot to stay in the house anyway), Ben and I addressed the back of the yard, in particular, the bushes that line our property. I was disturbed by the amount of trees that were growing between the bushes and thought we needed to cut those out before Ben trimmed the bushes back. Just like the front spreader, we filled up a compost bin in no time, so we utilized the empty box from the furnace to keep cutting away. When Tuesday rolled around, I bought another compost bin since our yard obviously requires it. I also researched invasive plants and it seems we were blessed with Japanese Honeysuckle, which though pretty and lovely to smell, will overcome your bushes, kill them, and then refuse to die even though you may try everything in your power to destroy the plant. The honeysuckle had already started killing our bushes, so you'll notice off to the right how much thinner they are in appearance after we cleared off the overgrowth on the top. We still have MUCH more landscaping to do, but the honeysuckle must wait for the moment. Just wait to you read the next blog post!